


Epson Projector Overheating Issues: A 2026 Guide to Troubleshooting and Prevention
August 23, 2026
Bose DesignMax: Commercial Sound System Guide South Africa 2026
August 25, 2026
Your premium Epson projector is a masterpiece of engineering, but straight out of the box, it’s likely hiding its true potential. Most enthusiasts settle for factory presets, yet they often find themselves frustrated by muddied blacks or skin tones that appear distractingly orange. Learning how to calibrate epson home cinema projector is the essential bridge between a standard home setup and a genuine, high-end private cinema. You’ve invested in world-class hardware; now it’s time to ensure you’re seeing every detail exactly as the director intended.
It’s natural to feel hesitant when faced with complex menu settings like Gamma and CMS. We’ve designed this guide to remove the guesswork and help you master your environment. You’ll discover how to unlock vibrant, colour-accurate images and perfectly balanced brightness for your unique room. We will walk you through the latest 2026 Epson Setting Assistant app, automatic lens calibration, and the Natural picture modes that professional installers favour. Prepare to transform your daily viewing into an immersive, sophisticated experience that provides the maximum return on your technology investment.
Key Takeaways
- Align your hardware with professional industry standards like Rec. 709 to move beyond restrictive factory presets.
- Master the “Big Three” adjustments of brightness, contrast, and colour saturation to learn how to calibrate epson home cinema projector for your unique environment.
- Enhance your viewing experience by controlling ambient light and using dark room finishes to maximise the projector’s native contrast.
- Leverage 2026 technology like the Epson Setting Assistant app to automate complex lens and image alignments with precision.
- Integrate premium visuals with high-end audio solutions to achieve a fully immersive and sophisticated home cinema atmosphere.
Why Calibration is Essential for Epson Home Cinema
Projector calibration is the precise alignment of your hardware output with global industry standards like Rec. 709 for high-definition content or BT.2020 for 4K. Learning how to calibrate epson home cinema projector isn’t just about fixing errors; it’s about reaching the peak of visual performance. Most users fall for the “Out-of-the-Box” fallacy, assuming factory settings are ideal. In reality, manufacturers design these presets to look punchy in bright showrooms, not in the controlled lighting of a sophisticated home cinema. These settings often prioritise brightness over accuracy, leading to a distorted image that ignores the director’s original vision.
Industry experts often highlight the importance of color calibration as the foundation of any high-end display setup. Epson’s proprietary 3LCD technology provides a significant advantage by delivering equal colour and white brightness. However, this power requires careful management. Without custom adjustment, the high light output can lead to oversaturated colours that lack nuance. For South African enthusiasts, this is particularly vital. Our local environment often involves intense natural light and large windows. Standard settings simply cannot account for the way South African sunlight interacts with your screen, making professional-grade optimisation a necessity rather than an optional extra.
The Science of Accurate Colour and Contrast
A perfectly calibrated image works in tandem with your audio to create a truly immersive world. Just as the 360 degree sound from a Bose Portable Home Speaker fills a room with acoustic precision, calibration ensures your visual space is equally accurate. This process respects the “Creator’s Intent,” ensuring the director’s chosen palette is what you actually see on screen. A key part of this involves the Gamma curve. This setting dictates how smoothly your projector transitions from black to white. When adjusted correctly, it reveals hidden shadow details in dark scenes that factory presets typically “crush” into a flat, black mess.
Common Signs Your Projector Needs Calibration
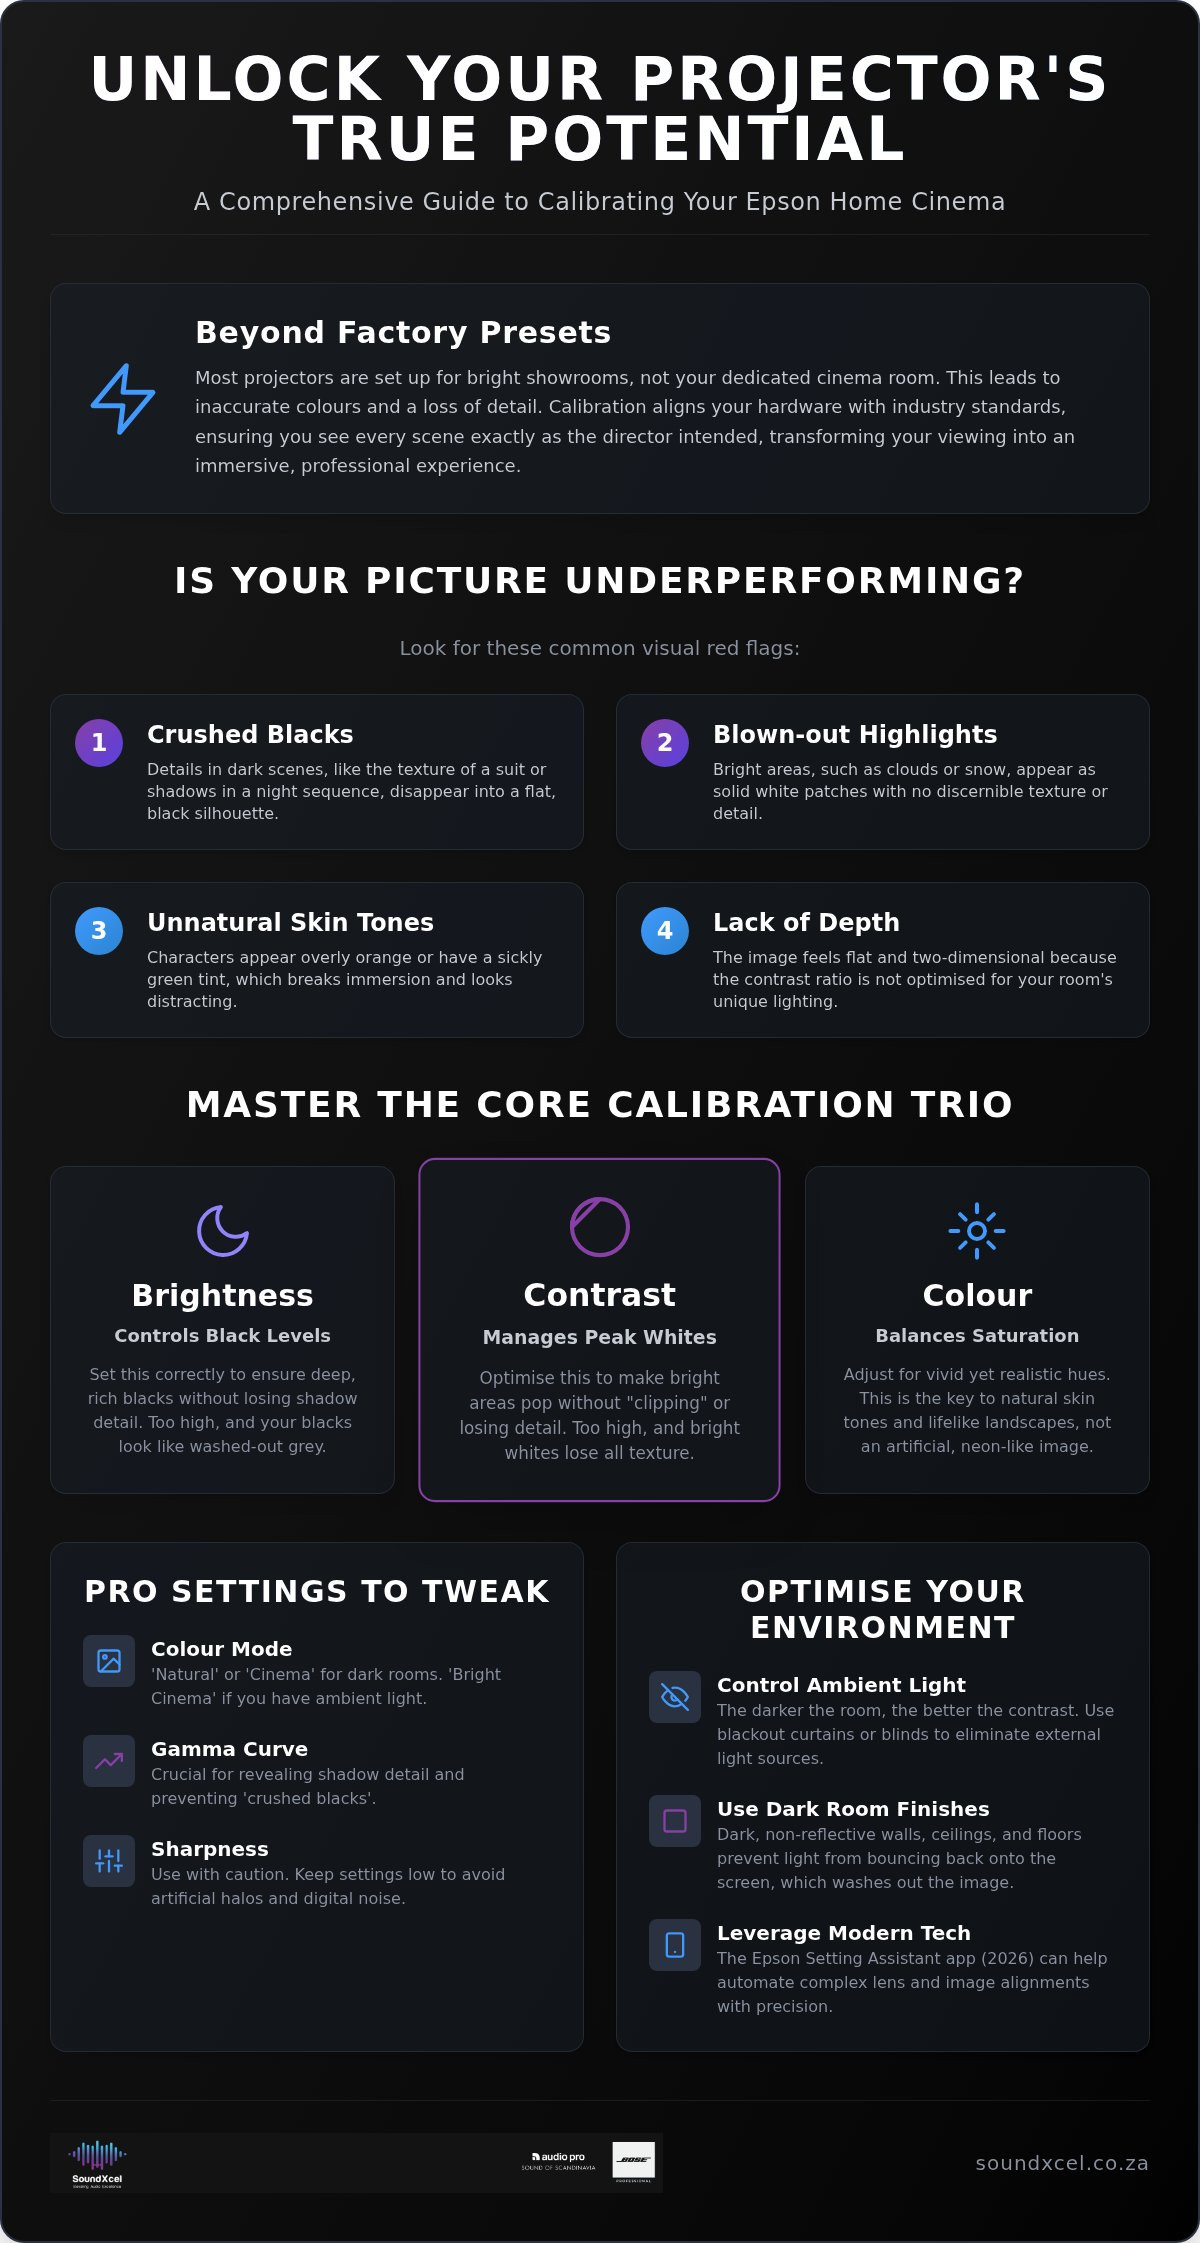
If you are researching how to calibrate epson home cinema projector, you’ve likely noticed your current image feels “off” compared to a commercial cinema. Look for these specific visual red flags:
- Crushed Blacks: You lose all texture in dark suits or night-time sequences, leaving only a silhouette.
- Blown-out Highlights: Bright clouds or snow-covered landscapes appear as solid white blobs without any discernible detail.
- Unnatural Skin Tones: Characters look either sickly green or overly orange, which immediately pulls you out of the narrative flow.
- Lack of Depth: The image looks flat and two-dimensional because the contrast ratio isn’t optimised for your specific room.
Essential Calibration Settings for Epson 3LCD Projectors
Mastering the fundamental settings is the first step in learning how to calibrate epson home cinema projector. Begin with the ‘Big Three’ adjustments: Brightness, Contrast, and Colour Saturation. Brightness actually controls your black levels; if it’s set too high, your shadows look grey and washed out. Contrast manages your peak whites; setting this too high will “clip” highlights, making you lose detail in bright clouds or snow. Colour Saturation ensures hues are vivid but realistic; it’s the difference between a natural landscape and an artificial, neon mess.
Select the correct Colour Mode to establish a solid baseline. For most dark room environments, the ‘Natural’ or ‘Cinema’ modes provide the most accurate starting point. ‘Bright Cinema’ is useful if you cannot fully black out your room, but it often sacrifices some colour accuracy for sheer punch. Adjust your Light Source or Lamp Power to suit your specific space. High power is great for daytime viewing, but ‘Eco’ or ‘Medium’ settings often improve black levels and reduce fan noise in dedicated cinema rooms. If you’re looking to upgrade your visual experience, explore the latest Epson Home Cinema Projectors available today.
White Balance is the process of ensuring whites are neutral without a blue or red tint.
Refine Sharpness and Detail Enhancement with caution. While it’s tempting to crank these up, doing so often introduces digital noise and artificial halos around objects. Keep these settings low to maintain a clean, film-like texture. Your goal is to reveal detail that’s already there, not to invent edges that look processed and harsh.
Advanced Adjustments: CMS and White Balance
Advanced users should dive into the Colour Management System (CMS). This tool allows you to adjust the Hue, Saturation, and Brightness (HSB) for individual primary and secondary colours. Professional-grade accuracy often requires multi-point greyscale tracking rather than a simple two-point adjustment. This ensures neutral colours across the entire range from dark to light. Use ‘Epson Super White’ if you notice highlight clipping in very bright scenes; it helps preserve detail that would otherwise be lost in the glare.
HDR and 4K Optimisation for 2026
Understanding how to calibrate epson home cinema projector for HDR ensures you get the best out of modern 4K discs. Use the projector’s tone mapping settings to balance overall brightness against specular highlights. Frame interpolation can smooth out motion in fast-paced sports, but keep it on the lowest setting for films to avoid the ‘soap opera effect’. Finally, check that your HDMI link is set to high-bandwidth mode. This ensures your hardware can handle the massive data requirements of 2026-era 4K HDR signals without signal dropouts.
DIY Calibration vs Professional Home Cinema Projector Calibration Service
Deciding between a hands-on DIY approach and hiring an expert is a pivotal moment for any home cinema enthusiast. If you want to learn how to calibrate epson home cinema projector yourself, you’ll likely start with calibration discs like Spears & Munsil or free digital patterns. This DIY path is highly educational and carries almost no financial risk. It allows you to “eye-ball” basic settings, which is often enough to significantly improve an unadjusted image. You’ll gain a deeper understanding of your hardware whilst saving on service fees.
However, the human eye is remarkably adaptive; it quickly adjusts to incorrect colour temperatures, making it a biased reference tool. DIY methods lack the precision required to measure exact luminance or specific colour coordinates. Without specialised hardware, you’re essentially guessing where the “correct” point lies. Professional calibrators use industrial-grade colorimeters and spectrophotometers paired with software like Calman to remove this biological bias. They don’t just make the image look “better”; they align it with the exact mathematical standards used in Hollywood mastering suites.
What to Expect from a Professional Service
A professional service provides more than just a menu adjustment. You should receive a comprehensive report detailing “Before” and “After” performance metrics, proving the tangible improvements in colour accuracy and contrast. Technicians create customised profiles for different viewing scenarios, such as a high-brightness mode for Sunday afternoon sports and a reference-dark mode for midnight film sessions. This expert touch ensures a seamless Bose Lifestyle and Epson projector setup, where the visual precision matches the acoustic excellence of your sound system.
Is Professional Calibration Worth the Investment?
Consider the cost of a professional service as a percentage of your total hardware investment. High-end Epson projectors are precision instruments; leaving them on factory settings is like buying a supercar and never tuning the engine. Beyond the aesthetic gains, professional optimisation can actually increase lamp longevity by ensuring the light source isn’t running harder than necessary. It also reduces eye strain during long viewing sessions by balancing blue light levels and peak brightness. Ultimately, it provides the peace of mind that you’re experiencing 100% of the performance you paid for, rather than settled for a generic showroom preset.
Optimising Your Cinema Room Environment
Even if you’ve mastered how to calibrate epson home cinema projector settings to perfection, a bright white room will compromise your results. This is due to the “Black Hole” effect. Light from the screen reflects off pale walls and ceilings, bouncing back onto the display and washing out black levels. Using dark, matte finishes in your viewing area creates a one-way path for light, which significantly improves perceived contrast and colour depth. You want the screen to be the only light source in the room to maintain the integrity of your calibration.
Physical placement is just as important as software adjustments. Aim for a dead-centre alignment whenever possible. Whilst Epson projectors offer robust keystone correction, using it actually degrades image quality by digitally compressing pixels. This reduces the native resolution you’ve worked so hard to optimise. Prioritise mechanical lens shift to keep your image sharp and your pixels perfectly aligned. This ensures that every nuance of your 4K content is preserved without digital artefacts.
Light Control Strategies for South African Homes
South Africa’s intense afternoon sun requires more than standard curtains. Invest in heavy-duty blackout blinds with side tracks to eliminate light leakage entirely. Even a small sliver of sunlight can ruin the black levels of a high-end 3LCD projector. A common “pro move” involves placing a dark, non-reflective rug directly in front of the screen. This simple addition prevents light from bouncing off polished floors and back onto the bottom third of your display, preserving the balance of your calibrated image.
Choosing the Right Screen for Your Calibrated Image
Your screen choice must match your room’s specific behaviour. A classic matt white screen is ideal for dedicated, pitch-black rooms where pure colour accuracy is the priority. If your room has some residual light that you can’t fully control, a Grey (High Contrast) screen helps preserve deep blacks. For multi-purpose living areas, an Ambient Light Rejecting (ALR) screen is essential to maintain image punch during the day. For more information on matching hardware to your budget and room type, consult our Epson projector price South Africa guide.
Ensure your environment is ready for a cinematic transformation by contacting our specialists for a custom integration consultation.
Elevating Your Experience with SoundXcel and Epson
Mastering how to calibrate epson home cinema projector settings is the final step in your journey toward a world-class home theatre. SoundXcel exists to support the South African home cinema community by providing the premium hardware and technical expertise required for these high-end environments. We understand that a projector is more than just a screen; it’s the centrepiece of your home’s entertainment ecosystem. By choosing an authorised dealer, you ensure your equipment arrives with the latest 2026 firmware and full local support.
True immersion requires a perfect marriage between sight and sound. Whilst your calibrated Epson delivers stunning 4K visuals, pairing it with the immersive audio of Bose QuietComfort Ultra Headphones creates a private cinema experience like no other. This combination is ideal for late-night viewing sessions where you want theatre-quality sound without disturbing the rest of the household. We invite you to explore our curated range of Epson projectors and Bose audio systems to find the perfect match for your specific lifestyle and room requirements.
The SoundXcel Difference: Expert Support Across South Africa
We provide national delivery and specialised support for all premium AV equipment across South Africa. Our team is committed to helping you build a bespoke system that lasts for years, not just a single season. You gain access to professional advice on both visual and audio calibration, ensuring every component of your setup performs at its absolute peak. We act as your sophisticated lifestyle curator, guiding you through the intersection of luxury and functional technology with ease and precision.
Next Steps: Transforming Your Living Room
Ready to take the next step? Begin with a quick five-minute audit of your current environment. Check for light leakage around windows, verify your projector’s physical alignment, and ensure your cables are rated for high-bandwidth 4K signals. Once you’ve identified the gaps, you can focus on how to calibrate epson home cinema projector settings or consider a hardware upgrade to the latest 2026 models. Use the following checklist to guide your progress:
- Audit your room’s light control and wall finishes.
- Verify that your projector is physically level and centred.
- Select the ‘Natural’ colour mode as your primary baseline.
- Schedule a professional calibration for maximum precision.
Contact the SoundXcel team today for a personalised consultation. We will help you navigate the complexities of room optimisation and equipment selection. Let us help you transform your daily viewing into a curated cinematic event that provides the best possible return on your Epson hardware investment.
Master Your Private Cinema Experience
Calibration is the essential final step that transforms a high-end piece of hardware into a world-class private theatre. By mastering how to calibrate epson home cinema projector settings, you move beyond generic showroom presets to achieve the precise colour accuracy and deep contrast that filmmakers intended. Remember that your room’s lighting and physical placement are just as critical as the digital adjustments within the menu. These elements work together to ensure your investment delivers its full potential.
Investing in premium hardware like Epson’s 3LCD technology deserves the support of specialists who understand the intersection of sophisticated visuals and immersive audio. As an authorised Epson dealer with a Bose specialised repair centre, SoundXcel provides national South African support to help you maintain your system at its absolute peak. We are here to ensure your technology integrates seamlessly into your lifestyle, providing a refined escape every time you dim the lights.
Explore our range of Epson Home Cinema Projectors and expert AV solutions at SoundXcel to begin your transformation today. Your journey toward the perfect image is just starting, and the results will redefine your home entertainment for years to come.
Frequently Asked Questions
Is it worth paying for a professional home cinema projector calibration service?
Professional calibration is highly recommended for enthusiasts who want to maximise their hardware’s potential. Whilst DIY methods offer a good start, experts use industrial-grade sensors to align your image with Hollywood standards. This precision removes the guesswork and ensures you’re seeing the full level of detail you paid for. If you’ve invested in a premium Epson 4K model, a professional service provides the final polish required for a truly immersive experience.
How often should I recalibrate my Epson projector?
You should aim to recalibrate your system every 500 to 1,000 hours of lamp use. Projector light sources naturally dim and shift in colour temperature over time, which can lead to a slight loss in accuracy. Newer 2026 laser models are more stable than traditional lamps, but a periodic check ensures your settings remain optimal. Regular maintenance keeps your skin tones natural and your black levels deep throughout the unit’s entire lifespan.
Can I use ‘Dynamic’ mode for movies if I like a bright image?
Avoid using ‘Dynamic’ mode for films as it prioritises brightness at the expense of colour accuracy and contrast. This mode often introduces a heavy green tint and crushes shadow detail in dark scenes. If your room has ambient light, ‘Bright Cinema’ is a much better alternative. It provides the extra punch you need without distorting the image to the point where it looks artificial or distracts from the narrative flow.
Will calibrating my projector make the lamp last longer?
Calibration can indeed extend your lamp’s life by allowing you to run the projector in ‘Eco’ or ‘Medium’ power modes. Most factory presets run the light source harder than necessary to impress in showrooms. When you learn how to calibrate epson home cinema projector for your specific dark room, you’ll find that lower power settings often yield better black levels. This reduced heat and strain significantly slow down the degradation of the light source.
Do I need to recalibrate if I move my projector to a different room?
Yes, moving your projector to a new environment requires a full recalibration. The colour of your walls, the type of flooring, and the amount of ambient light all interact with the image on the screen. A setting that looked perfect in a dark cinema room will appear washed out in a lounge with white walls. Always adjust your brightness and contrast levels to match the unique reflective properties of your new viewing space.
What is the best colour mode for watching sports on an Epson projector?
‘Bright Cinema’ is typically the best choice for sports, especially when viewing during the day. It provides the high light output needed to keep the image vibrant against South African sunlight. You might also consider the ‘Natural’ mode with a slight increase in colour saturation for a more realistic look on the pitch. These modes ensure that fast-moving action remains clear and colours stay punchy without looking oversaturated or processed.
Can calibration fix a blurry image or focus issues?
Calibration cannot fix physical blur or optical focus issues, as these are related to lens alignment and throw distance. However, it can improve perceived sharpness by optimising contrast and reducing digital noise. If your image looks soft, first ensure the lens is physically focused and the projector is level. Once the optics are set, software adjustments like ‘Detail Enhancement’ can add a final layer of crispness to your 4K content.
Does the screen material affect the calibration settings I should use?
Your screen material is a critical variable in the calibration equation. Different surfaces have varying gain levels that reflect light differently; whilst some grey screens are designed specifically to improve contrast in brighter rooms. When researching how to calibrate epson home cinema projector, you must account for any colour shift introduced by the screen fabric. A professional calibrator will always measure the light reflecting off the screen rather than the light coming directly from the lens.
